| Chapter 2 | To index | Haski the Robot |
What we did so far wasn't too bad, but there is one major drawback: The program works only on that specific working area! If for instance the first stack of items would have been only twofields away instead of three, we would have to change our program. So let's try to add some sort of cleverness or intelligence to our robot.
Gold, gold, gold!
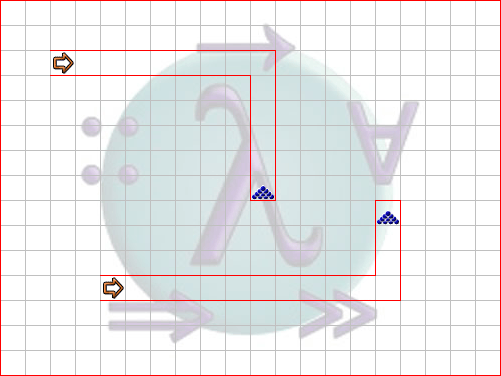
Let's start again by looking at another example: Our robots have found an old tunnel and at the end of that tunnel a heap of gold is waiting for us to collect it! Yes, that's right, you can have more than one robot at the same time, but more on that later. Here it's just to point out that we don't know in advance how long the sections of the tunnel will be and to which direction it will turn. Let's assume we just know there will be exactly two sections and therefore one curve.
So, how can we solve that? Intuitively one would want to walk straight on until one reaches a wall, then turn left or right, depending on which way the tunnel runs, and then walk to the end, again until one reaches a wall. Fortunately Haski provides a way to do this.
Sensors and conditional expressions
Our little robots have a few built-in sensors, which they can 'ask' whenever they want. A sensor will always answer "yes" or "no", or rather True or False, this result can then be used to make a decision. One example of such a sensor which will be useful for our treasure hunt is front_free, which answers True if there is no wall in front of the robot and False if there is one. Two other sensors are then right_free and left_free, they work just the same way for the respective direction (from the robot's point of view).
These sensors can be used inside so-called conditional expressions, the first one we look will at is While. It is used in the following way:
While <condition> <commands>
<condition> will be one of the sensors or a combination of several of them(we'll see later how to do that), whereas <commands> is, as the name suggests, a command or a sequence of those (connectec by &>), but this would then have to be put inside brackets (...).
So one thing we could think of here might be While front_free go_forward: This makes the robot move forward until it encounters a wall -- which is just what we want.
The two other conditional expressions you find in Haski are IfThen and IfThenElse, which are used as follows:
IfThen <condition> <commands>
IfThenElse <condition> <commands1> <commands2>
DoWhile <commands> <condition>
IfThen is pretty simple: If <condition> returns True, <commands> is executed, otherwise it is just disregarded. IfThenElse is a bit more tricky, at least until you get used to it: If <condition> returns True, <commands1> is executed, if it returns False, then <commands2> is executed. DoWhile is very similar to While, except that <commands> is always executed at least once, even if <condition> would evaluate to False. For instance DoWhile drop_item is_carrying could be rewritten as drop_item &> While is_carrying drop_item.
Still unclear? Let's just see how we will use the IfThenElse in our program:
IfThenElse left_free turn_left turn_right
So what does this do? When we reached the first wall, i.e. we arrived at the tunnel's curve, we give the robot this command. It then checks if there is no wall to its left side, in this case it turns left. In case there is a wall on the robot's left side, we automatically know that we have to turn right (since that's what we know about the tunnel), which is just what we do.
After that we only have to proceed to the end of the tunnel to fiend the gold. So let's put it all together:
main =
While front_free go_forward &>
IfThenElse left_free turn_left turn_right &>
While front_free go_forward
Note that every of the three blocks is regarded as one command on its own, which means we have to connect them using the &>-operator.
We made it, let's collect the precious treasure!
Now that we reached the pile of gold we of course want to take it with us. Here another sensor proves to be quite handy, namely field_has_item, which returns True as long as there is some item left left on the current field. All in all we receive the following program:
main =
While front_free go_forward &>
IfThenElse left_free turn_left turn_right &>
While front_free go_forward &>
While field_has_item take_item
I have prepared this code in the file example2.hs (including the function turn_left from chapter 1, since we use it here), so we can check it out right now! For now we don't care about getting out of the tunnel again, this can be done just in the same way as getting to the gold...
Robots galore!!
So how can you put multiple robots into the same working area? It's pretty simple. First of all the respective mapfile has to support it, but this is the case for our example2.map. The rest is taken care of with the parameters you give to the haski-application. In this case we need the following:
haski example2 example2,example2
The first, single example2 specifies the mapfile to be loaded. The second parameter consists of a comma-seperated list (no spaces!!) of the programs for the individual robots; in this case we want our two robots to use the same program, so we put example2 there two times.
(Just as an aside: If you don't specify two programs for a mapfile with two robots in it, only the first one is placed in the working area. Vice versa, if your mapfile specifies only one robot and you supply two or more programs to be used, only the first one is used for the one robot.)
Other sensors
Here is a short list of the other sensors a Haski-robot provides:
Combining sensors
Sometimes it may be needed to combine the values of several sensors, e.g. to check whether the robot is facing up and is standing in front of a wall (meaning there's a wall to the north of the robot). This combinations can be done in two ways, assuming two sensors: Either both of them should return True for the combination to be True (as with the wall to the north) or having at least one of them return True is sufficient. The first case, equivalent to an AND, can be expressed by <condition1> :& <condition2>, the second one, also called OR, is written as <condition1> :| <condition2>. The important parts here are :& and :|. To make it even more clear here are two tables showing all possible combinations:
|
|
It is important to note that, as soon as you use these combination operators, you have to include the whole expression in brackets, e.g. in the command IfThen (facing_up :& front_free) turn_right. Moreover, when you are building combinations of combinations it is always a good idea to put in some extra brackets, just to make sure...
Another nifty thing to have is the Not-operator: It inverts the value of the sensor it is applied to (or the value of any general sensor expression, which then has to be put in brackets). Here are some examples how to use it properly:
Not front_free
Not (is_carrying :| facing_right)
Not is_carrying :| facing_right
Make sure you understand the difference between the second and third line: In the third line only is_carrying is negated, whereas in the second line Not is applied to the whole bracketed combination of the two sensors. If you don't understand it fully try putting up a table like the ones above, where you insert all possible values of the two sensors.
A few words about brackets
As you saw above some things need to be put in brackets while others need not. In general it is safe to say that all expressions built of more than one element (elements being commands or sensors) should be put in brackets. Sometimes leaving out those brackets gives only a different result then the one intended, sometimes it's just wrong and you'll receive a parser error. Consider the following five examples:
While front_free (go_forward &> turn_right)
While front_free go_forward &> turn_right
(While front_free go_forward) &> turn_right
The effects of the first and second lines are different: In the first example both commands are repeated inside the While-loop, in the second only go_forward is repeated. Therefore the third line does exactly the same as the second -- it's never wrong to put in too many brackets...
We can now solve some pretty advanced problems with our robot, but there are still certain limits. We'll see some of them in chapter 3, where we'll have a look at a very powerful concept, recursion.
| by Lars Otten, 2004 |